

Operators
An operator is a per-pixel or per-sample processing unit that sits in the middle of the signal chain. Inputs bring video and audio into a scene; operators transform what those inputs produce — colour-correct, key, blur, sharpen, denoise, analyse, mix; Targets push the finished result somewhere useful. Operators are the part of Composer that does the actual look-and-feel work on a frame.
How operators work
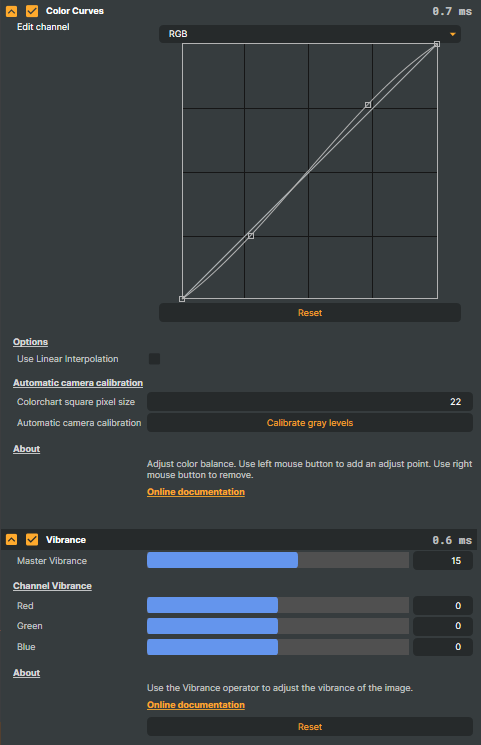
Operators apply to a layer within a scene. A single layer can carry as many operators as the project needs, stacked in a list, and they process the layer's output top to bottom: each operator reads the RGBA frame that the previous operator handed down, transforms it, and hands the result to the next operator. The bottommost operator's output is what the layer contributes to the composited scene.
Audio operators follow the same pattern on the layer's audio bus — the output of operator n is the input of operator n + 1. Most operators run on the GPU, so a long stack of effects on a 1080p / 4K layer remains real-time at broadcast frame rates as long as the underlying card has the headroom.
The order of the stack matters. A Gaussian Blur followed by a Sharpen looks very different from a Sharpen followed by a Gaussian Blur, so part of the work of building a project is finding the right operator order for the look you want.
Available operator types
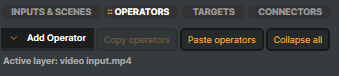
Composer ships with around 70 built-in operators, grouped by purpose. The Add menu uses the same category tree, so operators that work together tend to live next to each other:
- AI —
Image Classification,Object Detection,Face Detect,Crystal Speech, andSpeech To Textadd machine-learning analysis or processing to a stream. The classification / detection ones publish their results so scripts can react to what the model sees. - Audio Processing — full broadcast audio chain:
Compressor V2,Compressor,Limiter,Gate,Gain,Automatic Gain Control, the3-band Equalizerand10-band Equalizer,Low Cut,Band-Pass(Windows only),Sidechain Ducking,Delay,Audio Router, andAudio Recorder, plus the metering operatorsEBU R128(loudness compliance),Frequency Analyzer, andAudio Monitor. - Blur and Sharpen —
Gaussian Bluris the standard pick;Surface Bluris edge-preserving (great for skin smoothing);Directional Blurfor motion looks;Sharpenfor edge enhancement;Regional Contrastfor the photo-editing "clarity" effect. - Channel Operators —
Alpha Channel CoringandChannel Swap Filterfor low-level RGBA manipulation. - Chroma Keying —
HSV Keyeris the everyday choice (the most commonly used keyer in Composer);IBK 3D Keyerfor staffed productions where you can shoot a clean plate;Difference Mattewhen the background changes between two known frames;Light WrapandSpill Suppressionclean up the matte's edges after keying. - Color Correction —
Color Adjust,Color Curves,Grading LUT,Hue Shift,Color Shift,Vibrance,White Balance,Exposure & Gamma, plus the analysis toolsFalse ColorandHSV Correct. - Distort —
Corner Distortfor keystone / perspective correction. - Special Effects —
Edge Detection,Film Grain,Starglow,Vignette,Min/Max Filter, and the powerfulUV Remap(project the layer through an arbitrary UV map exported from Blender / Maya / Houdini). - Trackers —
Point Tracker,Motion Detect, and theHistogramanalysis tool. Specialised tracker pairs ship for casino game analytics:Roulette Wheel Tracker(V1 and V2),Wheel Tracker, each paired with its visualizer. - Misc —
Alignment Grid,Crop,Deinterlace,Video Delay,Noise Reduction,QR Code,Replay,Script Operator,Cav frame player, andLoad Generatorfor stress-testing.
For the full reference catalogue with per-component property tables, see the Operators manual.
Working with operators
Operators live on the Operators tab below the selected layer. The interaction model is the one used everywhere else in Composer:
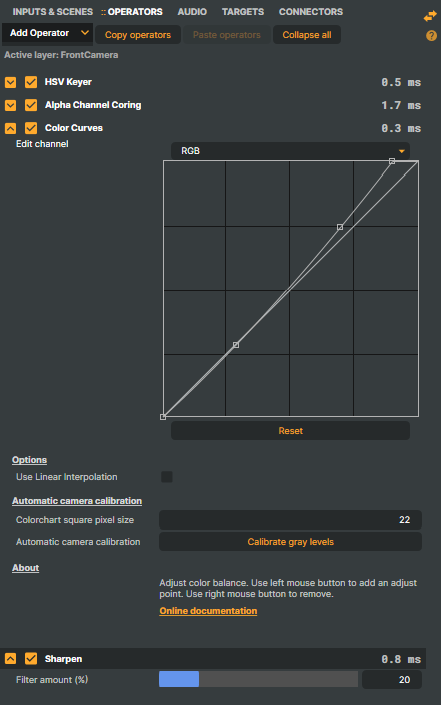
- Add via the Add Operator dropdown menu in the panel's toolbar.
- Rename by double-clicking the title.
- Reorder by drag-and-drop, or with the right-click Move ▸ submenu. Order matters — see How operators work above.
- Expand / collapse an operator's settings with the small arrow on its title bar so the panel stays scannable when many operators are stacked.
- Enable / disable with the checkbox on the title bar — a disabled operator is skipped on render, useful for quick A/B comparisons without removing the operator and losing its tuning.
The arrow and checkbox glyphs are small but they do the heavy lifting in a typical session:
 expand / collapse
  enable / disable
Context menus
Right-clicking inside the Operators panel opens one of two context menus depending on where you click — directly on an operator, or on the empty area below the last operator.
On an operator
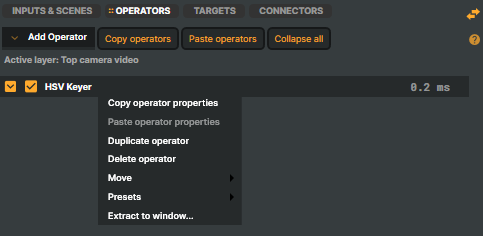
- Copy operator properties — copies the operator's settings to the clipboard so they can be pasted onto another operator of the same type, even on a different machine.
- Paste operator properties — applies previously copied settings to this operator. Greyed out unless the clipboard holds compatible settings for this operator type.
- Duplicate operator — adds an identical operator immediately below the selected one. Useful for quick layer-stacking experiments.
- Delete operator — single-shot remove. The keyboard shortcut Delete does the same.
- Move ▸ — reorder this operator within the stack: Top, Up, Down, Bottom. Same effect as drag-and-drop, just from the menu.
- Presets ▸ — Save as preset… writes this single operator's settings out as a named
.operatorpresetfile; Load from preset… applies a previously saved one. See Presets below. - Extract to window… — floats the operator's editor in its own draggable window. See Extract operator to window below.
On the empty area of the panel
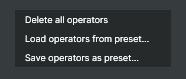
Right-clicking below the last operator (or anywhere in the panel that isn't an operator) opens a stack-wide menu that acts on the whole layer:
- Delete all operators — clears the active layer's stack in one action when you want to start over.
- Load operators from preset… — replaces the layer's stack from a saved
.layerpresetfile. - Save operators as preset… — saves the layer's entire stack (operator types, order, settings) to a
.layerpresetfile. See Presets below.
Presets
Operators support two kinds of saved presets:
- Per-operator presets — capture a single operator's settings as a named
.operatorpresetfile, stored underPresets\Operators\<OperatorType>\in Composer's installation directory (one subfolder per operator type). Useful for the colour grade you keep coming back to, the compressor curve you ship every show, or the exactHSV Keyersettings that work on your green stage. - Per-layer presets — capture the whole stack on a layer, including operator types, order, and settings, as a
.layerpresetfile underPresets\LayerOperators\in Composer's installation directory. Drop one of these onto a new layer and the entire treatment carries across.
Both kinds are plain files on disk, so they version-control well and can be shared between machines or projects without any export step.
Extract operator to window
Each operator has an Extract to window option in its right-click menu that floats the operator's editor in its own draggable window:
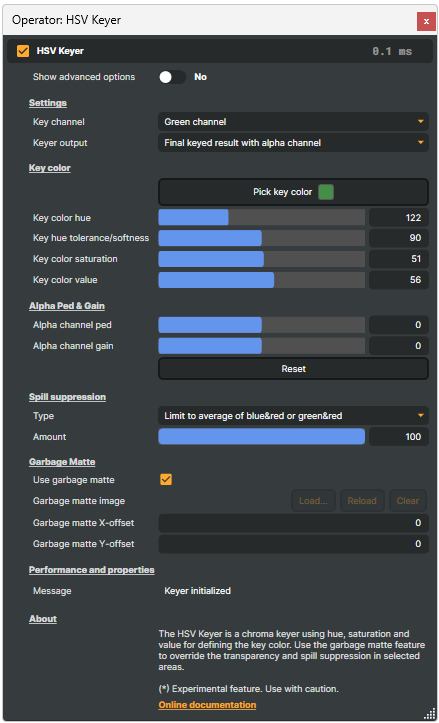
Useful on a multi-monitor rig where one screen drives the program output and another is dedicated to a live colour grade or audio mix — the extracted window stays put even when the layer selection changes in the main editor.
Custom operators
Operators are part of Composer's plug-in component model: every operator is a class derived from the engine's AbstractOperator base, scanned at startup the same way inputs and targets are. If none of the built-in operators fit your workflow — proprietary effects, in-house analysis tooling, custom GPU shaders — the same extension points used to ship the operators above are available for in-house plug-ins.