

User Guide
This manual covers the Composer Desktop UI and the workflows that span multiple components — managing projects, building scenes and layers, blending and keying, mixing audio, and running in Performance Mode for live operation. It's the conceptual layer above the per-component reference: the Inputs, Operators, and Targets manuals describe individual building blocks; this manual shows how to put them together.
If you're new to Composer, start with Getting Started for installation and licensing, then come back here.
User interface tour
Composer Desktop is a single window with two main layouts that the operator can flip between:
- Compositing layout — the visual workspace, used for authoring scenes, configuring inputs, operators, and targets, and driving the live programme.
- Audio mixer layout — the same project, but with the audio mixer expanded to fill the central area and per-strip channel-strip inspection on the side. Toggle between the two with Ctrl + M.
Both layouts share the same chrome: the main menu, the navigation tabs, performance metrics on the side, and the scene preview. Only the centre workspace changes.
Compositing layout
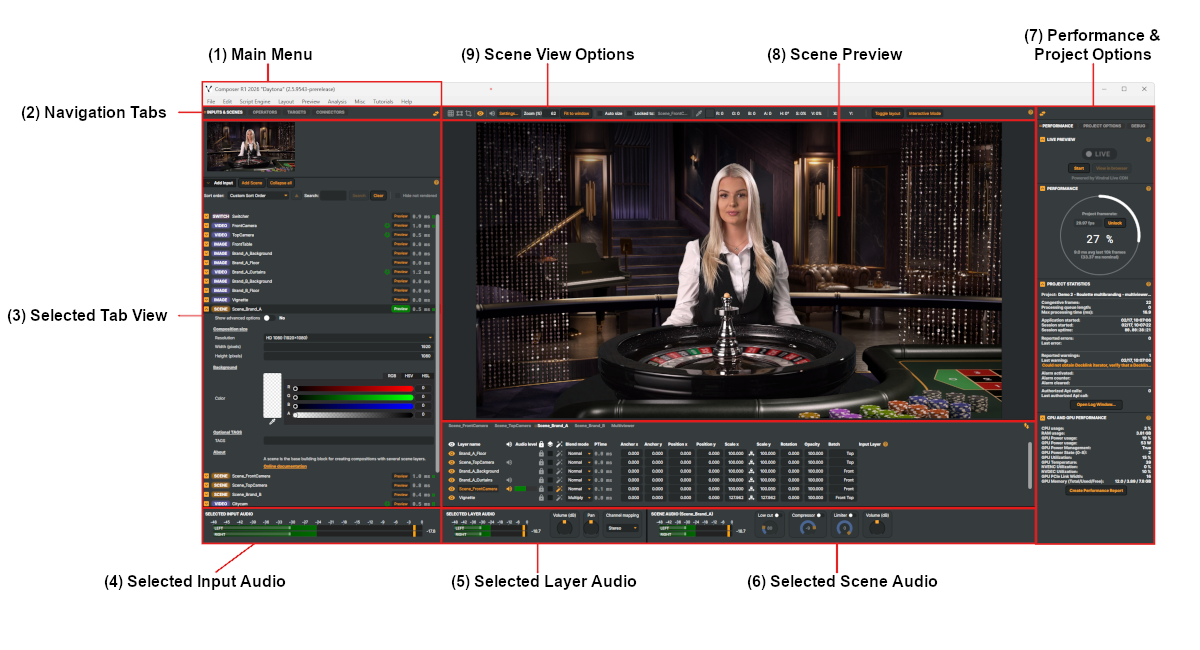
The compositing layout is what most operators see most of the time. Numbered above:
- Main Menu — application-wide features and settings (file, edit, view, analysis, misc, help).
- Navigation Tabs — switches the central workspace between the four core areas: Inputs & Scenes, Operators, Targets, and Connectors.
- Selected Tab View — the contents and configuration of whichever tab is currently active. Add, remove, rename, reorder, configure, and mute components from here.
- Selected Input Audio — audio-level metering for the currently selected input, so you can see at a glance whether a source is hot.
- Selected Layer Audio — per-layer audio meter plus volume, panning, and stereo-channel mapping. Layer audio is independent from the input's own level — a single source can contribute differently to different scenes.
- Selected Scene Audio — per-scene meter and the scene's own audio chain: low-cut, compressor, limiter, master volume.
- Performance & Project Options — real-time CPU / GPU / memory / frame-budget metrics on one tab; project-level options on the other.
- Scene Preview — a live preview of the active scene's composited video output, frame-accurate.
- Scene View Options — controls for the preview pane: zoom, fit-to-window, safe-area overlays, dim toggle.
Selected tab detail view
When you click a navigation tab, its detail view fills the central pane. The example below shows the Inputs & Scenes tab populated with several inputs — each row collapsed to a single line, ready to expand for editing:
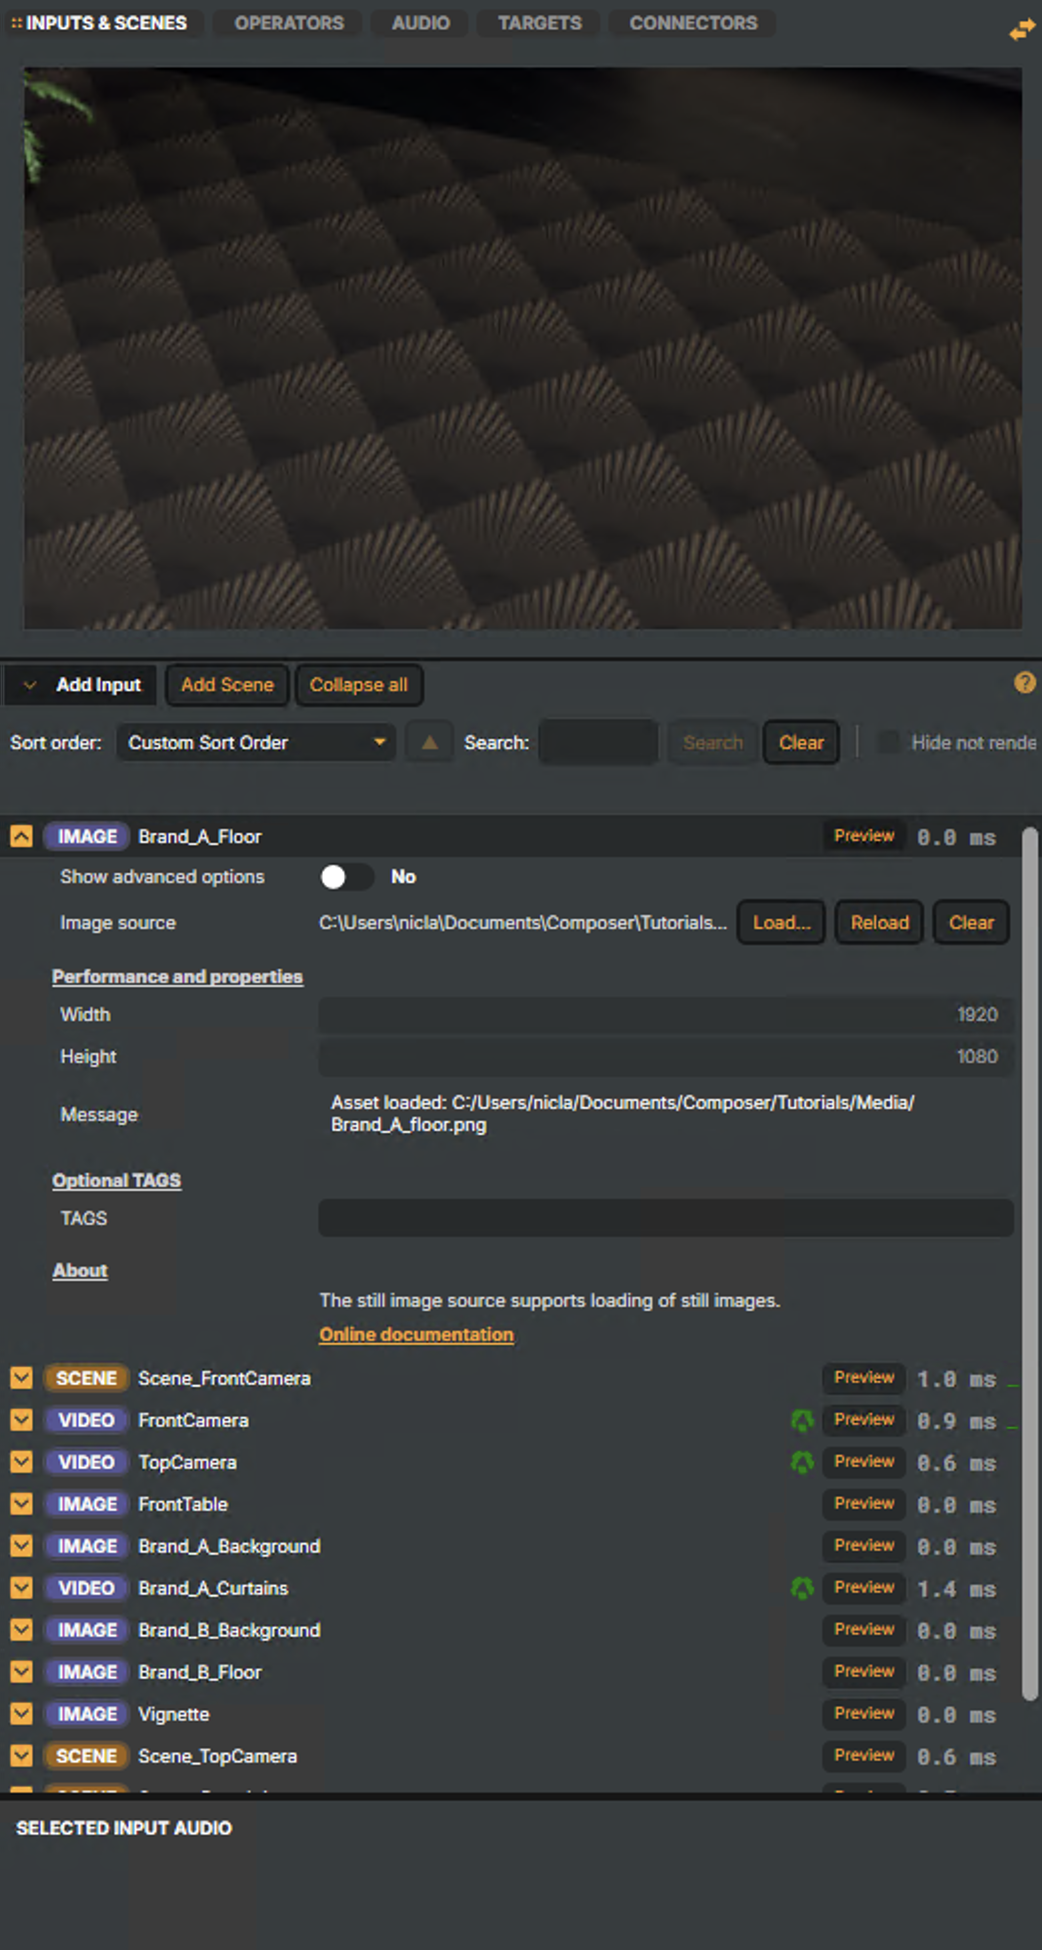
The mechanics are the same across the Inputs & Scenes, Operators, Targets, and Connectors detail views:
- Items in the list collapse / expand with the small yellow up / down arrow on the left side of each row.
- Rename an item by double-clicking the name next to the arrow.
- Delete an item by selecting its top row and pressing the
Deletekey (or via the right-click context menu). - Reorder items by drag-and-drop in the Operators and Targets views, or with
Ctrl + ↑ / ↓. Items in the Inputs & Scenes view also follow Sort order settings.
For per-panel deep-dives, jump into Inputs, Operators, Targets, or Connectors.
Audio mixer layout
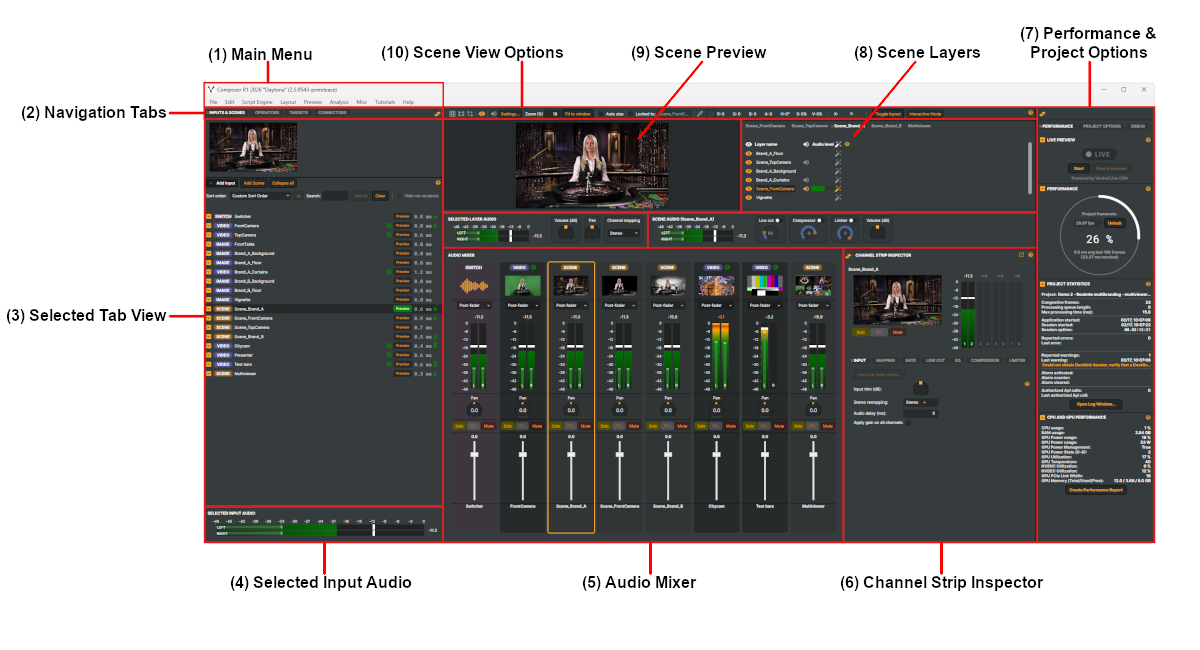
The audio mixer layout swaps the central workspace for the full mixer. The chrome is unchanged so you can navigate without losing context:
- Main Menu — same as in the compositing layout.
- Navigation Tabs — same.
- Selected Tab View — the navigation panel still drives what's selected; you can pick the input or scene whose audio you're mixing.
- Selected Input Audio — meter for the currently selected input.
- Audio mixer — every input bus and the master, as channel strips. Adjust gain, pan, mute, solo; route to AUX / BUS / SEND. The big ergonomic difference from the compositing layout is that the strips fill the centre of the screen so a live operator can run the show by feel.
- Channel Strip Inspector — the deep-dive for the currently selected strip: input routing, MAPPING, GATE, LOW CUT, EQ, COMPRESSOR, LIMITER, plus VU meters when 8-channel audio is enabled.
- Performance & Project Options — same as compositing.
- Scene Layers — quick read of the active scene's layer list while you're focused on audio.
- Scene Preview — live preview, same as compositing.
- Scene View Options — preview controls.
Common controls and conventions
A few mechanics are consistent across both layouts:
- Collapse / expand any panel with the small arrow in its title bar to free workspace.
- Extract a panel to its own window with the icon next to the collapse arrow. Useful on multi-monitor setups where one operator drives the programme from a dedicated screen.
- Activity log at the bottom of the window — runtime messages tagged by severity and subsystem. See Log window in the Operations manual.
- Status bar at the very bottom — Composer version, GPU load, frame budget, and the licence status indicator.
The Inputs / Operators / Targets manuals have screenshots and per-panel coverage of each pane's controls.