

Color Shift
Introduction
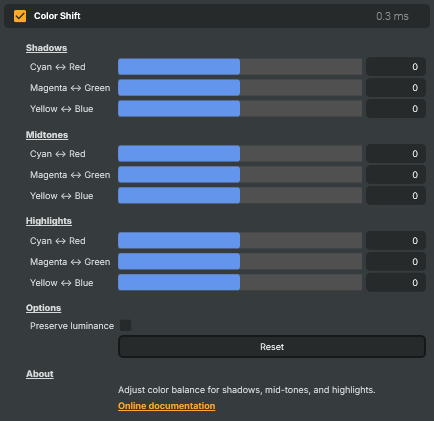
The Color Shift operator is the classic colour-grading "three-way wheels" exposed as a slider panel: nine sliders arranged as three tonal ranges (shadows, midtones, highlights) crossed with three complementary colour axes (Cyan ↔ Red, Magenta ↔ Green, Yellow ↔ Blue). Each slider runs from –100 to +100 and pushes only its targeted tonal range towards one end of its axis or the other, so a single instance can cool the shadows, warm the highlights and leave the midtones untouched — the building block of every cinematic teal-and-orange grade, every "warm sunset" treatment, and every quick fix for a mixed-lighting scene.
Use it to remove a colour cast that lives in only part of the tonal range (a green tint in shadows under fluorescent lights, a warm shift in highlights from tungsten spill), to match the colour signature of two cameras that don't quite agree on neutral, or to build a creative look on top of an already-calibrated source. For overall brightness or gamma changes reach for Color Adjust; for finer per-channel control with arbitrary curve shapes reach for Color Curves.
How it works
Internally the operator is a lift / gamma / gain colour grader. Each of the three tonal ranges drives a different part of the response curve:
- Shadows lift the toe of the curve — a positive Cyan ↔ Red value adds red to the darkest pixels and barely touches midtones, none of the highlights.
- Midtones bend the middle of the curve via gamma — a positive Yellow ↔ Blue value cools the mid-grey range while leaving black and white in place.
- Highlights raise or lower the top of the curve via gain — a positive Magenta ↔ Green value tints bright pixels green and barely touches the rest.
The three ranges overlap softly rather than as hard bands, so adjacent sliders blend smoothly into each other — a small shadow tint eases into an untouched midtone region without leaving a visible seam.
Preserve luminance is a global switch that changes how an axis adjustment is distributed across channels. With it on (the default), pushing one channel up automatically pulls the other two down by half, so the overall brightness of the picture stays the same and only the colour balance moves — the safer mode for live broadcast where you don't want exposure to drift as a grade is dialled in. With it off, only the primary channel moves; the picture brightens or darkens along with the colour shift, which produces stronger, more painterly looks but also makes it easier to clip whites or crush blacks.
Reset zeroes all nine sliders in one go — a quick way to bail out of a grade that's gone off the rails or to A/B against the flat source.
Common use cases
- Teal & orange — pull shadows towards cyan/blue and push highlights towards red/yellow; leave midtones alone. The single most-used cinematic look in modern broadcast.
- Warming a flat live source — small positive nudges on midtones Cyan ↔ Red, combined with a small negative on midtones Yellow ↔ Blue (towards yellow), give a cool studio feed a friendlier on-air feel without retouching skin tones.
- Killing a fluorescent green cast — small negative on midtones Magenta ↔ Green (pushes towards magenta). Targets the tonal range where skin tones live without affecting bright whites or deep blacks.
- Camera matching — when one camera reads warmer than another, dial the cooler camera's shadows and highlights towards red/yellow until the two cameras' grey patches match.
- Mixed-lighting fixes — when shadows take on one tint (e.g. tungsten warmth from a practical) and highlights take on another (e.g. daylight from a window), Color Shift can treat the two tonal ranges independently — something a global white-balance shift cannot do.
- Easing a baked LUT — placed after a Grading LUT, small per-range nudges can soften or push a look the LUT didn't quite land, without re-exporting the LUT from a grading tool.
Notes on positioning the operator
Color Shift expects a clean source. If the upstream picture still has a strong global colour cast, calibrate first with a Color Curves instance, then put Color Shift after it to apply the creative grade on top. Like all colour-correction operators, Color Shift should sit before any keyer, blur or compositing step — those operators are easier to dial in when the colours feeding them are already where you want them.
Color Shift - Settings
Shadows
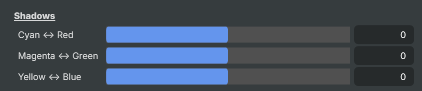
Shadows — colour balance controls applied to the darkest tones of the image.
| Property | Description |
|---|---|
Cyan <-> Red |
Cyan/Red balance in shadows. [min=-100, max=100, default=0]. 0 leaves shadows untouched. Negative values push shadows towards cyan (cooler); positive values push shadows towards red (warmer). Small values (±10–20) are typical for cinematic looks; large values quickly look unnatural. |
Magenta <-> Green |
Magenta/Green balance in shadows. [min=-100, max=100, default=0]. 0 leaves shadows untouched. Negative values push shadows towards magenta; positive values push shadows towards green. Useful for correcting fluorescent-lit shadows that pick up a greenish tint. |
Yellow <-> Blue |
Yellow/Blue balance in shadows. [min=-100, max=100, default=0]. 0 leaves shadows untouched. Negative values push shadows towards yellow (warmer); positive values push shadows towards blue (cooler). Cool shadows + warm highlights is the foundation of the classic teal-and-orange look. |
Midtones
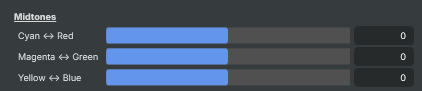
Midtones — colour balance controls applied to the middle tonal range, where most skin tones live.
| Property | Description |
|---|---|
Cyan <-> Red |
Cyan/Red balance in midtones. [min=-100, max=100, default=0]. 0 leaves midtones untouched. Strongly affects skin tones — small positive values add healthy warmth; negative values can give a sickly or cold appearance. |
Magenta <-> Green |
Magenta/Green balance in midtones. [min=-100, max=100, default=0]. 0 leaves midtones untouched. The most common axis for fixing fluorescent-lighting green casts on faces — try small negative values (push towards magenta). |
Yellow <-> Blue |
Yellow/Blue balance in midtones. [min=-100, max=100, default=0]. 0 leaves midtones untouched. The classic warm/cool midtone control — equivalent to shifting overall colour temperature on midtones only. |
Highlights
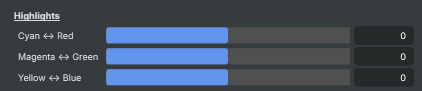
Highlights — colour balance controls applied to the brightest tones of the image.
| Property | Description |
|---|---|
Cyan <-> Red |
Cyan/Red balance in highlights. [min=-100, max=100, default=0]. 0 leaves highlights untouched. Negative values push highlights towards cyan; positive values push them towards red. Watch for visible discolouration in white objects when using strong values. |
Magenta <-> Green |
Magenta/Green balance in highlights. [min=-100, max=100, default=0]. 0 leaves highlights untouched. Negative values push highlights towards magenta; positive values towards green. Useful for fine-tuning sky tones or removing tint from bright clouds. |
Yellow <-> Blue |
Yellow/Blue balance in highlights. [min=-100, max=100, default=0]. 0 leaves highlights untouched. Negative values warm highlights (towards yellow); positive values cool them (towards blue). Combine with warm shadows for a balanced cinematic look or with cool shadows for the "teal & orange" style. |
Options
Options — global behaviour switches affecting how the colour shifts are applied.

| Property | Description |
|---|---|
Preserve luminance |
When on, brightness is held constant while colours are shifted. On preserves the original brightness/exposure of the image, so only colour balance changes — usually the safer default. Off lets colour shifts also push brightness up or down, which can produce stronger but less predictable looks. |
Reset |
Reset all settings to their defaults (all nine balance sliders to 0). |
Inherits from: AbstractOperator, AbstractAudioMetering.
See also: Color Shift in Script Engine Objects.
Related components
Composer's Color Correction family contains nine operators that work on the colour of the image. Each takes a different approach — picking the right combination is part of the grading workflow, and the operators are designed to be stacked. The other Color Correction operators are:
- Automatic Gain Control — measures average brightness in a sensor area and optionally nudges the picture back to a stored reference luminance. Good for stabilising drifting exposure on long-running feeds.
- Color Adjust — general-purpose colour correction with gain/gamma/lift, HSV adjustments, per-channel RGBA, and clipping in one operator. The fastest way to match cameras, tame highlights, or lift crushed blacks.
- Color Curves — master and per-channel (R/G/B/A) curve editor with an automatic grey-card camera-calibration workflow. The right choice when you need precise control over a specific tonal range.
- Grading LUT — applies a pre-baked Hald CLUT image to drop a finished colour grade onto a feed in a single step. The fastest way to deploy a house style across many compositions.
- HSV Correct — per-hue curves for hue, saturation and luminance. Boost just the blues in a sky, lift skin tones without touching the background, desaturate one specific colour family.
- Hue Shift — selects a hue band by centre, tolerance and softness, then shifts its hue, saturation or luminance independently. The tool for recolouring a specific object without affecting the rest of the image.
- Vibrance — boosts the colourfulness of muted tones while protecting already-saturated colours and skin tones. Make landscapes pop without making faces look orange.
- White Balance — corrects colour temperature (cool/warm) and tint (green/magenta) with presets for daylight, tungsten, fluorescent, and shade lighting.