

Color Adjust
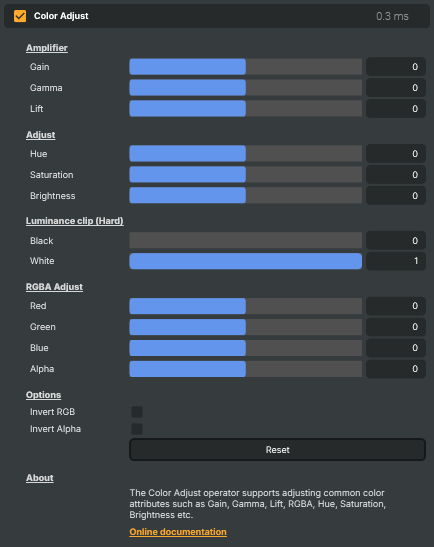
A general-purpose colour correction tool that bundles tonal range controls (gain/gamma/lift), HSV adjustments (hue, saturation, brightness), per-channel RGBA balance, luminance clipping and channel inversion into a single operator. Useful for quickly matching the look of a camera to others in a multi-camera shoot, taming overly bright highlights, lifting crushed blacks, removing a colour cast from a source, building a stylised look, or producing negative/inverted-alpha effects. For finer per-tonal-range corrections reach for ColorShiftOperator or CurvesOperator instead.
Color Adjust - Settings
Amplifier
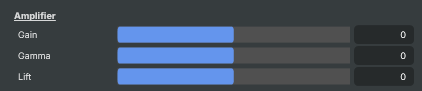
Amplifier — tonal range controls (gain, gamma, lift) that shape highlights, midtones and shadows.
| Property | Description |
|---|---|
Gain |
Boosts or cuts the highlights / overall signal level. [min=-100, max=100, default=0]. 0 leaves the image untouched. Positive values brighten and stretch highlights — useful when the source is too dark or under-exposed. Negative values pull highlights down and reduce overall intensity. Watch for clipping at the high end when pushing past +50. |
Gamma |
Adjusts the midtone curve. [min=-100, max=100, default=0]. 0 leaves midtones untouched. Positive values brighten midtones (image looks lighter and flatter), negative values darken them (image looks more contrasty and moody). The most musical control for general exposure tweaks since it largely preserves blacks and whites. |
Lift |
Lifts or crushes the shadows / black point. [min=-100, max=100, default=0]. 0 leaves the image untouched. Positive values lift the blacks (shadows become greyer and the image looks washed out — sometimes a desired filmic effect). Negative values crush shadows for deeper blacks and a punchier look. |
Adjust
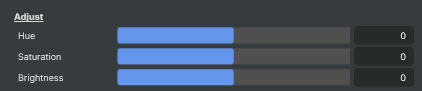
Adjust — hue, saturation and brightness controls in HSV colour space.
| Property | Description |
|---|---|
Hue |
Rotates all hues around the colour wheel, in degrees. [min=-360, max=360, default=0]. 0 leaves colours untouched. ±180 produces a complementary-colour shift (reds become cyan, etc.). Small values (±5 to ±15) are useful for matching mismatched cameras or correcting tinted footage. Large values create stylised looks but rarely look natural on faces or skin. |
Saturation |
Increases or reduces colour intensity. [min=-100, max=100, default=0]. 0 leaves the image untouched. -100 produces a fully desaturated (greyscale) image; positive values push towards more vivid, saturated colours. Above +50, already-saturated material may start to clip or look cartoonish. |
Brightness |
Adjusts overall brightness uniformly across the image. [min=-100, max=100, default=0]. 0 leaves brightness untouched. Positive values lighten everything; negative values darken everything. Unlike Gain or Gamma, Brightness applies a flat shift and can wash out blacks or clip whites quickly — prefer Gamma for subtler exposure changes. |
Luminance clip (Hard)
Luminance clip (Hard) — sets a hard black point and white point for the image.

| Property | Description |
|---|---|
Black |
Hard black-point clip. Anything below this luminance is forced to pure black. [min=0.0, max=1.0, default=0]. 0 keeps all detail in shadows. 0.05–0.10 is useful when a source has noisy or grey-looking blacks that should be deepened. Values above 0.2 will eat visible shadow detail. |
White |
Hard white-point clip. Anything above this luminance is forced to pure white. [min=0.0, max=1.0, default=1.0]. 1.0 keeps all highlight detail. Lowering this value (e.g. 0.9) maps the brightest 10% of the image to white — useful when highlights look dingy. Aggressive values blow out detail. |
RGBA Adjust
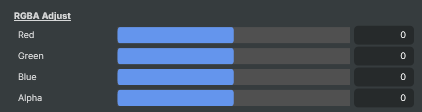
RGBA Adjust — per-channel level controls for red, green, blue and alpha.
| Property | Description |
|---|---|
Red |
Boosts or cuts the red channel. [min=-100, max=100, default=0]. 0 leaves the channel untouched. Use small positive values to warm an image; negative values to remove a red cast (e.g. from incandescent lighting). |
Green |
Boosts or cuts the green channel. [min=-100, max=100, default=0]. 0 leaves the channel untouched. Negative values remove a green cast (e.g. from fluorescent lighting); positive values lean the image towards green/magenta-magenta. |
Blue |
Boosts or cuts the blue channel. [min=-100, max=100, default=0]. 0 leaves the channel untouched. Positive values cool the image (useful for shade/overcast scenes); negative values warm the image and reduce a blue cast. |
Alpha |
Boosts or cuts the alpha channel (overall transparency). [min=-100, max=100, default=0]. 0 leaves transparency untouched. Negative values fade the layer towards fully transparent; positive values push partially transparent pixels towards fully opaque. |
Options
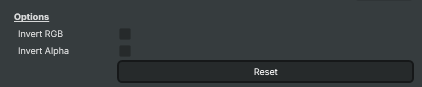
Options — channel inversion toggles for creating negative or alpha-flipped looks.
| Property | Description |
|---|---|
Invert RGB |
Inverts the red, green and blue channels to produce a colour negative. Off by default. Useful for converting scanned film negatives, creating stylised graphics, or quick X-ray-like effects. Alpha is unaffected — use InvertAlpha for that. |
Invert Alpha |
Inverts the alpha channel — fully transparent becomes opaque and vice versa. Off by default. Useful when a key/matte source has the wrong polarity, or for swapping the kept and removed regions of an alpha mask. |
Reset |
Reset all settings to their defaults (all amplifier, HSV, RGBA and luminance values to 0; white clip to 1.0; both invert toggles off). |
Inherits from: AbstractOperator, AbstractAudioMetering.
See also: Color Adjust in Script Engine Objects.
Related components
Composer's Color Correction family contains nine operators that work on the colour of the image. Each takes a different approach — picking the right combination is part of the grading workflow, and the operators are designed to be stacked. The other Color Correction operators are:
- Automatic Gain Control — measures average brightness in a sensor area and optionally nudges the picture back to a stored reference luminance. Good for stabilising drifting exposure on long-running feeds.
- Color Curves — master and per-channel (R/G/B/A) curve editor with an automatic grey-card camera-calibration workflow. The right choice when you need precise control over a specific tonal range.
- Color Shift — three-zone colour balance (shadows / midtones / highlights) along Cyan/Red, Magenta/Green, Yellow/Blue. Build cinematic teal-and-orange looks or fix mixed-lighting casts that hit shadows and highlights differently.
- Grading LUT — applies a pre-baked Hald CLUT image to drop a finished colour grade onto a feed in a single step. The fastest way to deploy a house style across many compositions.
- HSV Correct — per-hue curves for hue, saturation and luminance. Boost just the blues in a sky, lift skin tones without touching the background, desaturate one specific colour family.
- Hue Shift — selects a hue band by centre, tolerance and softness, then shifts its hue, saturation or luminance independently. The tool for recolouring a specific object without affecting the rest of the image.
- Vibrance — boosts the colourfulness of muted tones while protecting already-saturated colours and skin tones. Make landscapes pop without making faces look orange.
- White Balance — corrects colour temperature (cool/warm) and tint (green/magenta) with presets for daylight, tungsten, fluorescent, and shade lighting.