

Inputs
An input is the start of the signal chain: it brings a video, audio, or data source into a Composer scene so it can be composed, processed, and pushed out. Inputs sit on the left of the conceptual chain — the Operators come next, transforming or combining their output, and the Targets eventually push the composited result to disk, a stream, or a hardware port. A scene can host as many inputs as the project needs and they all run on the same render tick.
Note — Core licence input limits
A Vindral Composer Core (free) licence imposes two caps on inputs:
- At most 40 inputs across the project.
- At most 2 Decklink (Blackmagic) capture inputs as a subset of the input cap.
See Activating a license for the full Core-licence restrictions table.
Available input types
Composer ships inputs covering every common production source. The panel groups them into categories, and the right-click Add input menu lets you pick from the same tree:
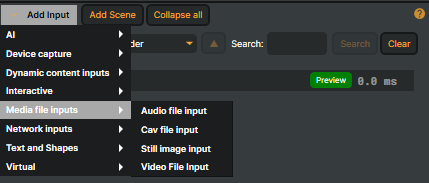
- AI —
LLM (Ollama)runs a local language model and exposes its output as a text source;Text To Speech (ElevenLabs)turns scripted text into spoken audio in real time. - Device capture —
ASIO Device Capturefor low-latency audio interfaces andBlackMagic DeckLink Capture v3for SDI / HDMI video.Panasonic PTZcontrols and previews a Panasonic PTZ camera over IP. - Dynamic content —
Switchercuts between several upstream inputs,Batch Processorautomates repeatable processing of a queue,Oscillatorgenerates a programmable audio tone, andTest Signal Generatorproduces broadcast test patterns and audio for line-up. - Interactive —
Interactive Buttonexposes a clickable trigger that scripts can wire up to actions in the project. - Media files —
Video File Input,Audio File Input,Seamless Audio File Input,Still Image Input, andCAV File Inputread content from disk. The seamless variant is built for gap-free loops. - Network —
NDI Inputfor the NDI network protocol, plusRTMP input,SRT Input, andSRT Input 16 channel audiofor inbound streams. - Text and shapes —
Text Inputrenders configurable text overlays;Rectangleis a solid-colour fill for backgrounds, lower-third bases, and matte plates. - Virtual — the Web Page family (
Web Page (Chromium, cross-platform),Web Page (Chromium, Windows),Web Page (Chromium, Windows, WebGL),Web Page (Ultralight, cross-platform)) embeds an HTML / CSS / JS surface for graphics, dashboards, or live web content.Audio Channel Stripexposes a mixer-style audio channel with EQ, gain and routing.
For the full reference catalogue with per-component property tables, see the Inputs manual.
Working with inputs
Inputs live on the Inputs tab and respond to the same set of interactions used elsewhere in Composer:
- Add via the + button, the right-click menu on the panel, or the Add input entry in the application menu.
- Rename by double-clicking the title — the new name is what scripts, the activity log, and the WebSocket event stream see.
- Reorder by drag-and-drop, or with Ctrl + ↑ / ↓ to move the focused input one slot at a time. Order is purely cosmetic — every input renders independently on the same tick.
- Right-click context menu — operations on the selected input: add to a scene, duplicate, delete, replace a layer's source, extract to a floating window, and more. The Context menu section below lists every option.
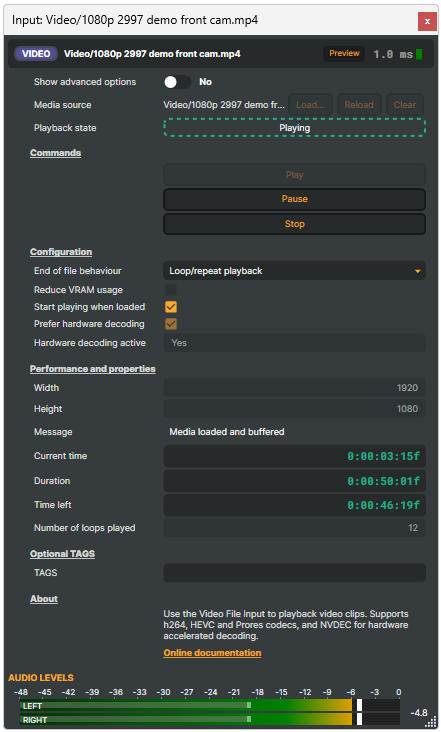
The Extract to window option floats an input's editor in a separate, draggable window — useful on a multi-monitor rig where one screen drives the program output and another is dedicated to live tuning.
Context menu
Right-clicking an input opens a context menu of operations that act on that input. Some options only apply to specific input types — for example, Set as active scene is enabled only for scenes, and Open location in Explorer... only for inputs that read from a file. Options that don't apply to the right-clicked input are shown grayed out.
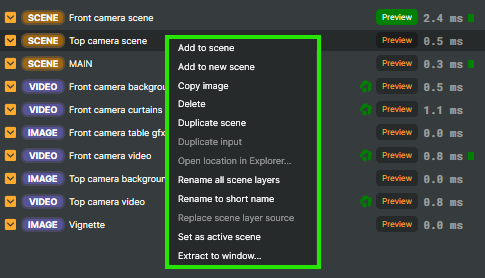
| Option | What it does |
|---|---|
| Add to scene | Adds the input as a new layer in the currently active scene. Not available for the Batch Processor input. |
| Add to new scene | Creates a new scene sized to match the input's dimensions and adds the input as its only layer. The scene is named after the input. Not available for the Batch Processor input. |
| Copy image | Copies the input's current rendered frame to the clipboard as a bitmap. Enabled only for video-bearing inputs. |
| Delete | Removes the input from the project. A scene cannot be deleted if it is the only scene in the project. |
| Duplicate scene | Creates a copy of the selected scene with all of its layers. Enabled only when a scene is right-clicked. If the duplicated scene contains LightWrap operators, their background source layer references are cleared in the duplicate and need to be re-assigned. |
| Duplicate input | Creates a new input of the same type with all of the original's configurable properties copied across. The duplicate is given a unique name based on the original. |
| Open location in Explorer... | Opens Windows Explorer at the folder containing the input's source file. Enabled only for inputs that read from a file. If the file cannot be located, an error dialog is shown. |
| Rename all scene layers | Renames every scene layer that uses this input to match the input's current name. Asks for confirmation and shows the number of layers that will be renamed. |
| Rename to short name | If the input's name is currently the full file path, shortens it to just the file name. Only meaningful for file-backed inputs. |
| Replace scene layer source | Replaces the source of the currently selected scene layer with this input. If the layer's name matched the previous source's name, the layer is renamed to match the new source. |
| Set as active scene | Makes the selected scene the project's active scene. Enabled only when a scene is right-clicked. |
| Extract to window... | Opens the input's editor in a separate, floating window so it can be parked on a second monitor or alongside other panels. Re-running the command on the same input brings the existing window to the front. |
Sort order
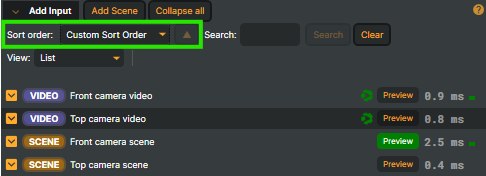
Long lists become unwieldy fast. The sort menu offers several modes so the panel can be organised the way the operator thinks about the show:
| Option | What it does |
|---|---|
| Name (A-Z) | Alphabetical order by input name. |
| Custom Sort Order | Manual drag-and-drop order. Edits persist with the project. |
| Icon Text | Orders inputs by their small icon-text label (CAM, MIC, GFX, …), so inputs that share a label cluster together. |
| Group by Category | Groups inputs using the same category buckets used in the Add menu. Group headers are shown between sections. |
| Tag | Orders inputs by their user-assigned tag string. Inputs without a tag cluster together at one end of the list. |
| Folders | Replaces the flat list with a folder view where inputs can be organised into user-created folders. One level of folders, no nesting. See Folders below for the full workflow. |
Folders
When Sort order is set to Folders, the flat input list is replaced by a folder view. Folders are user-created, one level deep (no nesting), and persist with the project. Use them to group related inputs — for example, all camera sources in a "Cameras" folder and all graphics in a "GFX" folder.
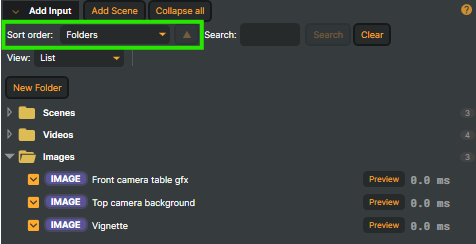
Each folder shows a folder icon, its name, and a badge with the number of inputs it holds.
Note
Folders are always collapsed when a project is opened, regardless of how they were left in the last session.
Creating a folder
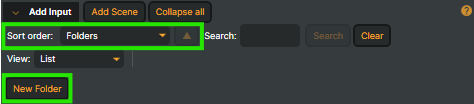
Click the New Folder button in the toolbar at the top of the folder view. A folder named New Folder is added at the end of the list. Rename it immediately by following the steps below.
Renaming and deleting folders
All three actions live in the folder's right-click menu:

| Option | What it does |
|---|---|
| Rename (F2) | Switches the folder name to inline edit mode. Also triggered by double-clicking the folder header. |
| Delete (keep contents) | Removes the folder; inputs return to the root level. Also triggered by the Delete key. |
| Delete (and contents) | Removes the folder and every input inside it. Use with care — the inputs cannot be recovered. |
When renaming, the new name is applied as you type. Press Enter or click outside the box to commit; Escape closes the editor but does not roll back changes.
Reordering folders
Drag a folder up or down and drop it above or below another folder. A horizontal indicator line shows where the folder will land — drop above the line to place it before the target, below to place it after. Dropping a folder on empty space or on an input moves it to the bottom of the list.
You can also select a folder and press Ctrl + ↑ / ↓ to move it one slot at a time among the other folders.
Adding inputs to a folder
Drag an input onto a folder. The input is moved into that folder — whether it came from the root level or from a different folder. To drop the input at a specific position within the folder, drop above or below another input inside it.
Note
Newly created inputs are placed at the root level. Drag them into a folder afterwards if needed.
Removing inputs from a folder
Two ways:
- Drag the input out of the folder onto the root area or another root-level input.
- Right-click the input and choose Remove from folder.
Reordering inputs
Drag an input above or below another input — either inside the same folder, or among the root-level inputs. The horizontal drop indicator shows the target position.
Alternatively, select an input and press Ctrl + ↑ / ↓ to move it one slot at a time within its folder, or among the root-level inputs if it isn't in a folder. Moving an input in or out of a folder is drag-and-drop only.
Searching in Folders mode
The search box at the top of the panel applies in Folders mode too. Folders with no matching input are hidden, and root-level inputs not matching the filter are hidden. The same 3-character threshold applies — see Search inputs.
* wildcards work in Folders mode too, but they are anchored to the full name: cam* matches names that start with cam, *main matches names that end with main, and cam*main matches names that start with cam and end with main. Plain text without * still does a contains-match.
Hiding inputs not being rendered
When a scene has dozens of inputs but only a handful are on air at any moment, the panel can be filtered to show only the ones currently being rendered. The toggle is one click and the rest of the inputs remain in the project — they're just hidden from the panel until they're brought into the composite.
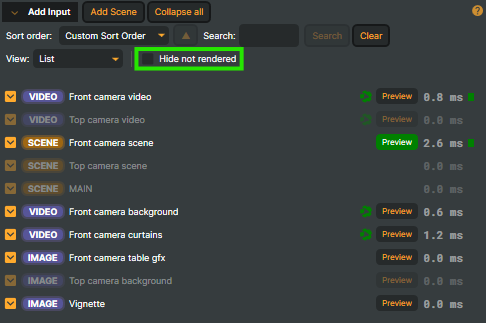
See Hide not rendered in Performance and project options for the full description and how it relates to the Render Tuning project option that this filter depends on.
View modes
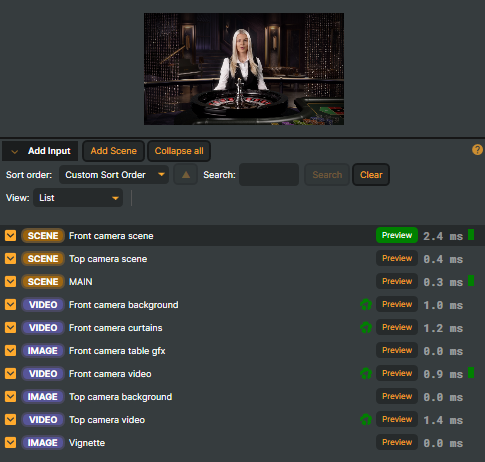
The View dropdown at the top of the inputs panel switches how each input row is rendered in the list. The selection affects only the row layout — it doesn't change what inputs are present, their order, or what they output.

| Mode | What you see |
|---|---|
| List | Each row leads with the input's coloured category icon and a short label (CAM, MIC, GFX, …). This is the default and the most compact layout, useful when the panel holds many inputs. |
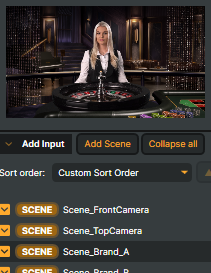
| Thumbnails | The category icon is replaced by a small live preview of the input's current frame. Useful for scanning a long list for a specific source by eye. |
The other elements of the row — name, status indicator, Preview button, compute time and VU meter — are present in both modes.
Thumbnail preview
When the View dropdown is set to Thumbnails, video-bearing inputs show a small live thumbnail in their panel header, so you can see what's coming through without opening the editor. The thumbnail updates on every render tick of the input that produced it.
Saving the thumbnail
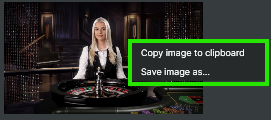
A right-click on the thumbnail opens a small menu that lets you copy the current frame to the clipboard or save it to a file. Useful for grabbing a reference still during rehearsal, building a contact sheet, or feeding a graphics designer a frame to colour-match against.
Search inputs
The search box at the top of the panel filters the list by input name and by the user-assigned tag. The match starts after 3 characters so a hesitant first keystroke doesn't immediately rearrange the panel:
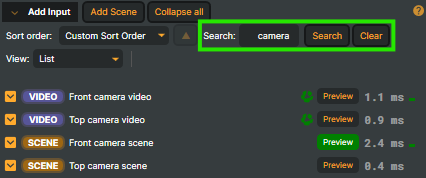
* wildcards are supported. For example, cam*main matches inputs whose name contains cam somewhere followed (anywhere later) by main. Plain text without * does a contains-match.
Preview button
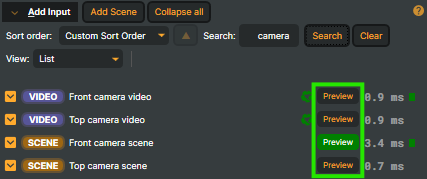
Each input carries a Preview button that pipes the input directly to Composer's Audio Preview / Video Preview outputs without going through the scene's composited output. Useful for confirming that a fader change, a routing tweak, or a re-cabled mic is working before taking the source to air.
Running-state indicators
Each input carries a small status badge in its title bar so you can see at a glance what it's doing:
| Indicator | Meaning |
|---|---|
| 🟢 spinning | The input is running normally and producing data. |
| 🟡 triangle | The input logged a warning. Hover for the message and timestamp. |
| 🔴 circle | The input is in an error state — typically a disconnected device, missing file, or unreachable network endpoint. |
Inputs that have been added but not yet started carry no badge.
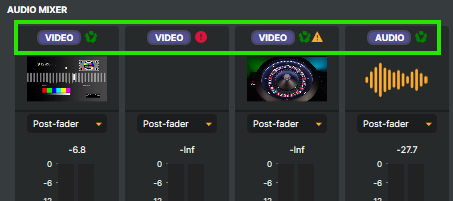
Audio-bearing inputs add a small VU meter to the title bar so the operator can confirm sound is reaching the input even when its panel is collapsed; a clipping pixel turns red and stays lit briefly so brief peaks aren't missed.
Custom inputs
Inputs are part of Composer's plug-in component model: every input is a class derived from the engine's AbstractInput base, scanned at startup the same way operators and targets are. If none of the built-in inputs fit your workflow — a proprietary capture card, a custom IP protocol, a bespoke generative source — the same extension points used to ship the inputs above are available for in-house plug-ins.