

Audio mixer
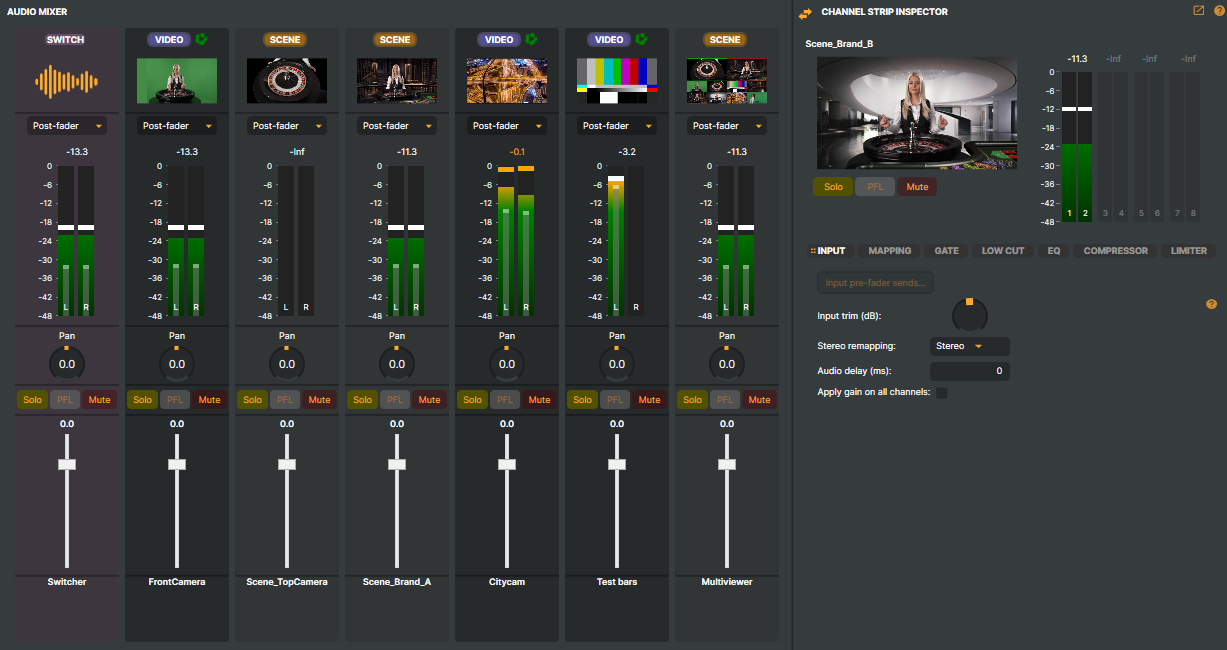
The Audio mixer provides a centralised view of all audio-capable inputs in a project — media inputs, microphones, Audio Channel Strip submix buses — presenting them in a familiar mixer-style layout that makes it easy to monitor levels, apply adjustments, and balance multiple signals in real time.
Unlike configuring audio directly from each input, the mixer brings everything together in one place so you can quickly compare, tweak, and refine your mix.
Accessing the audio mixer
Three ways to open the audio mixer:
- Click the audio-mixer button
 in the scene-preview toolbar.
 - Choose Layout → Audio Mixer from the main menu.
- Press Ctrl + M to toggle between the Compositor and Audio Mixer layouts. See Keyboard shortcuts for more key combinations.
Mixer strips
Each strip in the Audio mixer corresponds to one audio-capable input. Whenever a new audio-capable input is added to the project, it automatically appears as a strip — the mixer always reflects the current state of the project's audio sources without extra configuration.
Tip — Reorder audio strips
The order of mixer strips always matches the order of inputs in the Inputs & Scenes tab. To reorder strips in the Audio mixer, simply reorder the inputs under the Inputs & Scenes tab — the mixer updates automatically.
Tip — Hide audio strips
To hide an audio strip from the mixer without disabling its audio, enable Hide in the input's Audio options. Helpful for keeping the mixer uncluttered when dealing with many sources.
From each mixer strip you can
- Monitor levels via the VU meter.
- Adjust Gain (volume) with the fader.
- Control Pan (stereo balance).
- Mute / Solo the input.
- Enable Pre-Fader Listening (PFL) for monitoring.
- Adjust auxiliary sends to
Audio Channel Stripsubmixes.
These controls overlap with the Audio options available on each input, but the mixer presents them in a more traditional mixing interface. For advanced functions — such as rerouting audio to different stereo pairs or detailed per-strip configuration — use the Channel Strip Inspector or the input's own Audio options.
Audio Channel Strips
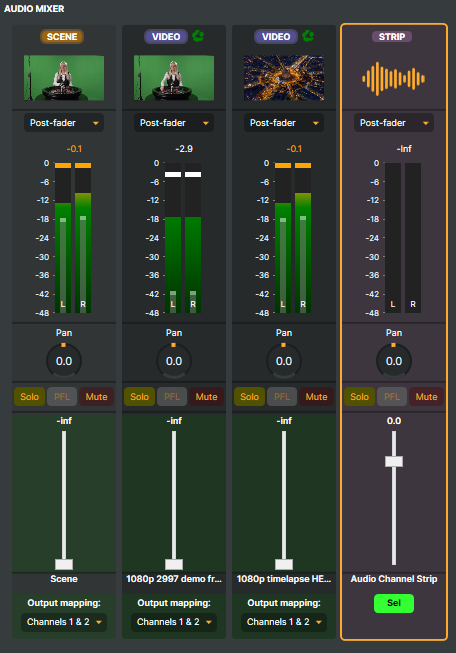
An Audio Channel Strip is a virtual input that acts as an audio bus (or submix). Unlike other inputs, it has no source of its own — instead, it receives audio sent from other inputs in the project. Useful for:
- Grouping multiple sources under one fader.
- Creating independent monitor mixes.
- Setting up parallel-processing workflows.
Channel Strips appear in the mixer with the label STRIP and an orange waveform icon.
Sending audio to a Channel Strip
- Click the Sel button on the Channel Strip you want to route audio to.
- The other strips turn dark green and display send faders.
- Drag any input's send fader to set how much audio is sent to the Channel Strip. The Up and Down arrow keys give finer control.
- Click Sel again to exit routing mode.
Toggle input open/close
Clicking the buttons at the top of each strip toggles the corresponding input open or closed in the Inputs & Scenes view, so you can jump from a strip to its source without leaving the mixer layout.

Context menu
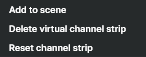
Right-click any mixer strip for the per-strip context menu:
| Option | Description |
|---|---|
Add to scene |
Adds the selected input to the currently active scene. |
Delete virtual channel strip |
Deletes the Audio Channel Strip from the project. |
Reset channel strip |
Resets all audio settings (volume, pan, mute, solo, sends, etc.) back to their default values. |
Warning icons
Warning icons appear on mixer strips to alert you when an issue has occurred during operation.

| Icon | Description |
|---|---|
Stop icon |
A critical problem has occurred. Check the activity log for detailed information. |
Warning icon |
A non-critical issue has occurred. Hover the icon for a brief description, or check the log for more details. Click the icon to dismiss it from the UI. |
Channel Strip Inspector
The Channel Strip Inspector is a panel on the right side of the audio mixer. Click any strip and the Inspector updates to show that strip's controls and audio configuration:
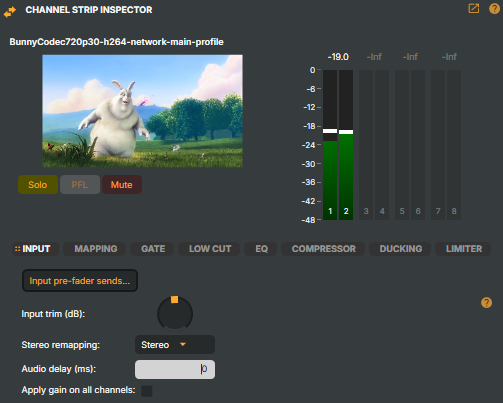
From the Inspector you can:
- Toggle Solo, PFL, and Mute (PFL only audible when audio preview is active), mirroring the controls on the strip and input itself.
- Trim level gain, remap stereo channels, adjust delay.
- Configure the advanced processing chain —
Mapping,Gate,Low-Cut,EQ,Compressor,Limiter.
See the Channel Strip Inspector page below for the full reference.
Processing workflow
For more on the internal audio-processing pipeline — input chain, mixer strip, layer audio, scene audio — see Audio processing workflow below.