

Scenes and layers
A scene is a stack of layers composited together into one finished output (RGB+alpha video and audio). Every project hosts at least one scene; most projects host several, and complex multi-output broadcasts can host dozens.
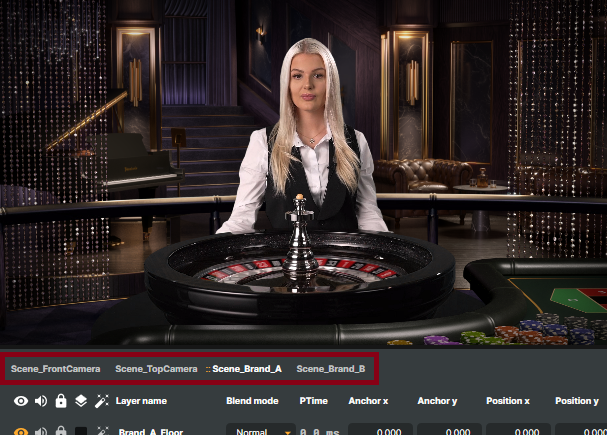
Scenes appear as tabs across the top of the Desktop window. The active scene is shown in bold; click any other tab to switch.
Note — Core licence scene limit
A Vindral Composer Core (free) licence allows at most 4 scenes per project. See Activating a license for the full Core-licence restrictions table.
Adding and managing scenes
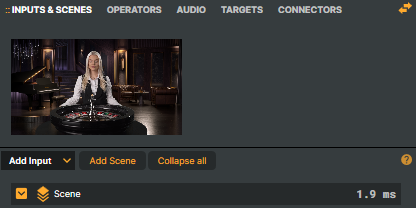
Use the small + button to add a scene to the project:
Right-click a scene tab to access the per-scene context menu — rename, duplicate, delete, or reorder:
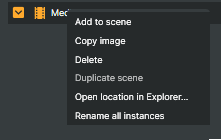
Duplicate copies the entire scene — every layer, every operator, every target — into a new scene. This is the fastest way to spin up a branded variant of an existing scene: duplicate, then swap the logo input and retarget the output. Reorder is purely cosmetic; scenes always render in parallel on the same render tick regardless of tab order.
Scene properties
Each scene exposes a properties panel that controls the scene's output resolution, frame rate, audio configuration, and overall transform:
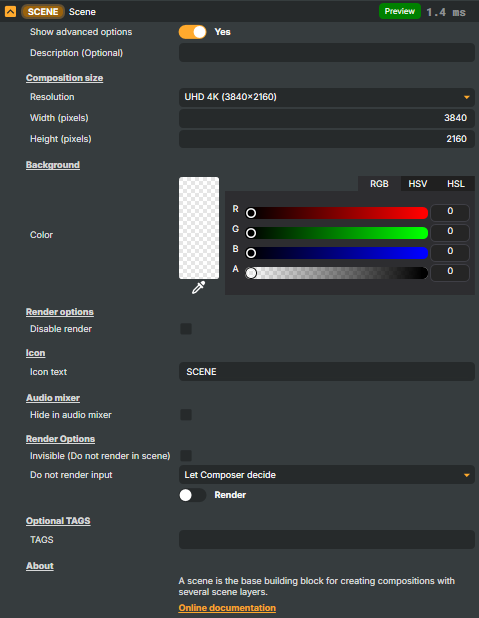
The output is RGB+alpha at the chosen resolution and frame rate; alpha is always preserved through the pipeline so the scene can be used as a layer in another scene without losing transparency. Audio is stereo by default but can be expanded to 8 channels via Project Options for surround-style productions.
Layers
A layer is one input placed inside a scene. Adding an input to a scene from the Inputs panel creates a layer; removing the layer doesn't remove the underlying input (the input stays available to other scenes). Layers stack from bottom to top in the layer list, mirroring the visual stacking in the scene output (top of the list = front-most layer).

In the preview, the selected layer is highlighted with a yellow outline; other layers show a slightly dimmed outline. The selected layer can be moved and resized directly in the preview using the corner handles, with optional snap-to-guide alignment — see Moving, resizing, and rotating layers for the full set of mouse and keyboard interactions.
Working with layers
- Add an input to a scene — drag from the Inputs & Scenes tab onto the layer list, or right-click the input and choose Add to scene.
- Reorder layers (Z-order) — drag and drop, or
Ctrl + Up / Downon the selected layer. - Duplicate a layer — right-click → Duplicate layer.
- Resize the layer-name column — hover the area before the speaker icon and drag.
- Convert a layer to a precomp scene — right-click → Create precomp scene from layer, useful when you want to apply operators to a stack of layers as a single composite. (See also Composite layers below for the live alternative.)
Tip
Numerical properties on scenes, inputs, operators and layers are draggable — left-click and drag horizontally to scrub the value up and down.
Layer options
Each row in the layer list exposes the following controls:
| Option | Description |
|---|---|
Eye icon |
Enable / disable layer video. |
Speaker icon |
Enable / disable layer audio. |
Audio Level |
Per-layer L/R peak meters. Turns red when the level exceeds 100 % (0 dB). |
Lock icon |
Lock / unlock layer move and scale in the preview. |
Layer / alpha icon |
Four alpha-channel modes: Default, Layer, Layer+, Layer-. |
Operator icon |
Indicates the layer has operators; click to open the Operators tab on this layer. |
Layer name |
The layer's display name (defaults to the input or scene name). |
Blend mode |
Compositing blend mode applied to this layer. See Blend modes below. |
Processing time |
GPU kernel execution time in milliseconds, when enabled. |
Anchor X / Y |
Centre coordinate for rotation. |
Position X / Y |
Layer position; 0, 0 is the upper-left corner. Use arrow keys (with the layer selected) to nudge. |
Scale X / Y |
Percentage scale. Right-click for Reset and Scale to fit. |
Rotation |
Rotation in degrees, around the anchor. |
Opacity |
Layer transparency, 0 – 100 %. |
Batch |
One or more space-separated batch tags (see Batches below). |
Layer audio
When you select a layer with audio, Composer surfaces a dedicated VU meter at the bottom of the layer list with controls for that layer's audio:

Scene audio
Each scene also has its own VU meter showing the combined audio levels from all its layers, plus the scene's own processing chain (low-cut, compressor, limiter, master volume):

For the full audio signal flow see Working with audio in scenes and Audio processing workflow below.
Layer context menu
Right-click any layer for the per-layer context menu:
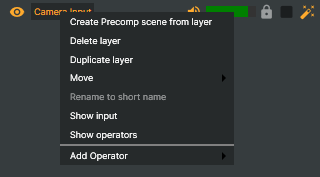
- Create precomp scene from layer — converts the selected layer (and operators) into a new scene used as a precomp.
- Delete layer.
- Duplicate layer.
- Move — Top, Up, Down, Bottom.
- Rename to short name — sets the layer name to the input's short name.
- Show input — opens the source input.
- Show operators — opens the Operators tab on this layer.
- Add Operator — quick-add an operator to this layer.
Batches
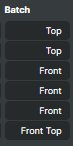
A Batch is a tag — or several space-separated tags — that lets you control a group of layers together. Tag every overlay layer for "FrontCam" with FrontCam, every overlay for "BackCam" with BackCam, then a single API call (or Connector / Script Engine call) toggles the whole group at once.
Use cases:
- Switch between camera angles by toggling layers tagged
FrontCam,BackCam,WideShot. - Toggle groups of overlays or graphics with a single trigger.
- Drive scene composition from external automation, scripts, or a Stream Deck.
Integration tip
Batches can be controlled via the
Batch Processorinput, Connectors, the Script Engine, or the Companion app (Stream Deck).
Batch HTTP API
Composer exposes a direct HTTP API for batch operations:
http://[YOUR_IP:PORT]/api/batch/[ACTION_TYPE]?batch=[BATCH_NAME]&scene=[SCENE_NAME]&comparison=[COMPARISON_TYPE]
Action types:
| Action | Effect |
|---|---|
showlayersolo |
Show layers matching batch; hide every other layer. |
showlayer |
Show layers matching batch. |
hidelayer |
Hide layers matching batch. |
Comparison types (default is contains):
containsequalstartswithendswith
Examples:
Show every layer tagged FrontCam across the project:
http://127.0.0.1:44433/api/batch/showlayer?batch=FrontCam
Show only the Scoreboard layers in GameScene, hiding everything else in that scene:
http://127.0.0.1:44433/api/batch/showlayersolo?batch=Scoreboard&scene=GameScene
Hide every layer whose batch tag ends with Logo:
http://127.0.0.1:44433/api/batch/hidelayer?batch=Logo&comparison=endswith
Scene-design considerations
Building Composer scenes is usually a collaboration — studio teams, graphics designers, project managers, and clients each contribute. The final result depends on camera specs, the graphics layer structure, lighting, chroma-key configuration, presenter appearance, and the integrations driving the show.
Simple setups (single camera, a colour-correction operator, one RTMP target) are quick to stand up. Complex configurations — multi-camera switching, multi-scene compositing, chroma key, 3D graphics aligned to physical structures, external event triggers — benefit from up-front planning. Understanding how inputs, scenes, operators, and targets interact is fundamental, and adding backend automation always introduces additional moving parts.
If you want help scoping a complex production, RealSprint's Professional Services team can help — see Getting help.