

Vignette
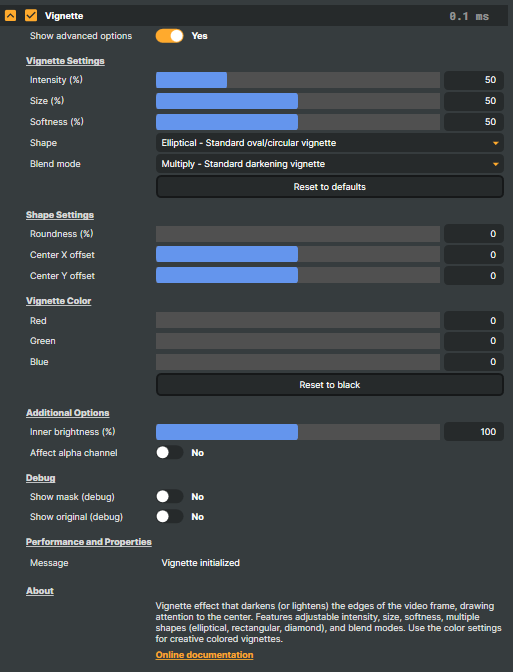
The Vignette operator darkens (or lightens) the edges of a layer to draw the viewer's eye toward the centre of the frame. The effect mimics a phenomenon every photographer recognises: the gradual fall-off in brightness from the centre of a lens out to the corners. Real lenses do this because of the geometry of how light passes through glass; here it's reproduced as a controllable, intentional creative choice.
Use it to:
- Add a cinematic, focal feel to talking-head and interview shots — the eye lands on the speaker first.
- Frame a scene without using a hard mask, keeping the boundary soft and organic.
- Simulate the look of an older camera or vintage lens with strong corner fall-off.
- Add mood to night-time, low-key, or moody environments where dimming the edges deepens the atmosphere.
- Create stylised, coloured edge tints (a warm gold rim, a cold blue surround) for graphics or branded looks.
Because every adjustment is applied per-pixel on the GPU, the operator runs in real time at full broadcast frame rates and can sit anywhere in the operator chain.
How it works
The operator generates a soft mask centred on the frame and uses that mask to mix the original picture with a darkening (or lightening, or coloured) overlay. Three controls shape the look of the mask:
- Intensity — how strong the effect is overall.
0disables it. Around50–100gives a natural cinematic feel. Above100produces a strong, stylised vignette that can crush the corners to black. - Size — how much of the centre stays untouched. Low values let the fall-off start almost from the middle of the frame; high values keep most of the image clear and push the dimming out to the very edges.
- Softness — how the transition from clear centre to dark edge is feathered. Low values give a hard, masked-out look; high values feather the transition into a smooth, organic curve.
In normal use you'll want a high softness value — that's what makes a vignette read as natural rather than as an overlaid graphic.
Shape and blend mode
A vignette is more than just a circle of darkness, and the operator gives you two extra dials for stylisation:
Shape controls the geometry of the mask:
- Elliptical — the default. A circular shape that does not account for the image's aspect ratio.
- Aspect Ratio Ellipse — follows the picture's aspect ratio for the classic camera-lens vignette every viewer instinctively reads as "natural".
- Rectangular — a rounded rectangle. Useful when you want a vignette that follows the shape of the screen rather than implying a lens.
- Diamond — a more angular, stylised frame. Stand-out look for graphics, idents, and stings.
Blend mode controls what the mask actually does to the underlying image:
- Multiply — the default. A standard darkening vignette: the corners go darker.
- Screen — the inverse. A lightening vignette where the corners brighten — useful for dreamy / overexposed looks.
- Overlay — a contrast-enhancing vignette. Darks get darker and lights get lighter at the edges, so the centre pops in contrast.
- Soft Light — a much subtler blend, ideal when the effect should be felt rather than seen.
For a more stylised look, pair a non-default blend mode with the Vignette Color controls (in the advanced section) to tint the edges any colour you like — gold rims, blue surrounds, vintage sepia frames, or any brand-aligned palette.
When to reach for it
A vignette is a finishing touch — apply it late in the operator chain so it sits on top of colour-correction, keying, and any other manipulation. Subtle is almost always better than obvious; a viewer who notices the vignette is being distracted by it. Start at low intensity with high softness and only push the dial up when the shot really needs the extra focus or mood.
Vignette - Settings

| Property | Description |
|---|---|
Show advanced options |
Vignette Settings
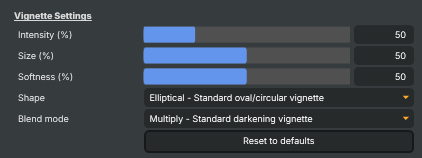
Vignette Settings — main controls for strength, size, softness, shape, and blend.
| Property | Description |
|---|---|
Intensity (%) |
Strength of the vignette, percent. [min=0, max=200, default=50]. 0 disables the effect. 50-100 gives a natural, cinematic darkening. Above 100 produces a strong, stylised vignette that can crush the corners to black. |
Size (%) |
Size of the clear centre, percent. [min=0, max=100, default=50]. 0 means the vignette starts right at the centre. Higher values keep more of the image untouched and push the falloff out toward the edges. |
Softness (%) |
Softness of the falloff between bright centre and dark edges. [min=0, max=100, default=50]. 0 gives a hard, vignette-with-a-mask look. Higher values feather the transition for a smooth, organic falloff. |
Shape |
Shape of the vignette. [default=Elliptical]. Elliptical follows the picture's aspect for a classic camera-lens vignette. Rectangular gives a softened-rectangle frame. Diamond produces a more stylised, angular frame. |
Blend mode |
How the vignette mixes with the image. [default=Multiply]. Multiply darkens the edges (the standard vignette). Screen lightens them. Overlay boosts contrast at the edges. Soft Light gives a subtle, gentle effect. |
Reset to defaults |
Reset all settings to their defaults (intensity 50, size 50, softness 50, elliptical, multiply, centred). |
Shape Settings
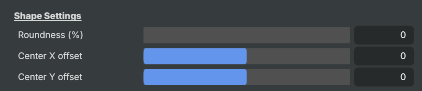
Shape Settings — fine-tune the vignette's roundness and centre position.
| Property | Description |
|---|---|
Roundness (%) |
(advanced) Roundness of the vignette shape, percent. [min=0, max=100, default=0]. 0 stretches the shape to match the picture's aspect ratio (typical lens vignette). 100 forces a perfect circle/square/diamond regardless of frame shape. |
Center X offset |
(advanced) Horizontal offset of the vignette centre. [min=-100, max=100, default=0]. 0 centres horizontally. Negative values shift it left, positive shift it right. Useful when the subject isn't centred in the frame. |
Center Y offset |
(advanced) Vertical offset of the vignette centre. [min=-100, max=100, default=0]. 0 centres vertically. Negative values shift it up, positive shift it down. |
Vignette Color
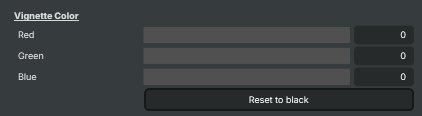
Vignette Color — tint the vignette away from neutral black for stylised looks.
| Property | Description |
|---|---|
Red |
(advanced) Red component of the vignette colour. [min=0, max=255, default=0]. 0 leaves the vignette pure black (standard darkening). Raise for warm coloured vignettes. |
Green |
(advanced) Green component of the vignette colour. [min=0, max=255, default=0]. |
Blue |
(advanced) Blue component of the vignette colour. [min=0, max=255, default=0]. Raise for cool, blue-tinted vignettes. Combine with red and green for any colour cast. |
Reset to black |
(advanced) Reset the vignette colour back to black (a neutral darkening vignette). |
Additional Options
Additional Options — extra controls for the centre brightness and alpha behaviour.

| Property | Description |
|---|---|
Inner brightness (%) |
(advanced) Brightness boost in the clear centre, percent. [min=50, max=150, default=100]. 100 keeps the centre untouched. Below 100 dims the centre slightly. Above 100 brightens it — useful for emphasising the focal subject by lifting just the middle. |
Affect alpha channel |
(advanced) Apply the vignette to the transparency (alpha) channel as well. [default=No]. On = the layer becomes more transparent at the edges, useful when compositing the layer over other content. Off = only the colour is darkened or tinted. |
Debug
Debug — preview the mask or bypass the effect for setup and troubleshooting.

| Property | Description |
|---|---|
Show mask (debug) |
(advanced) Show only the vignette mask as a grayscale image (read-only, debug). Useful for visualising shape, size, softness, and centre offset while tuning settings. |
Show original (debug) |
(advanced) Bypass the vignette and show the original image (read-only, debug). Quick A/B comparison without disabling the operator. |
Performance and Properties
Performance and Properties — status messages from the operator.

| Property | Description |
|---|---|
Message |
Most recent status message from the operator (read-only, debug). |
Inherits from: AbstractOperator, AbstractAudioMetering.
See also: Vignette in Script Engine Objects.